

To continue our series on installing and fixing basketball systems, today we’re going to talk about replacing your old backboard and installing a new one to an existing basketball hoop pole.
The instructions can sometimes be too generic and not match the product you receive. And a manufacturer too often shows an ideal setup and not the real one. That’s why it’s essential to get the key parts right and fix the imbalances in the move.
There’s no need to buy a new basketball hoop if some parts of your former basketball hoop (like a pole) are still working. If your pole is still high quality and sturdy, why not to save money?
This install does take some work so if you are lazy and have low patience, then hire a handyman or a neighbor via a case of beer to install it for you. But if this process worked very well on my friend’s existing 20-year-old Lifetime pole, you too can do this right in less than two hours.
My Experience
I’ve already had an in-ground basketball hoop when we bought the house. Figured I should purchase backboard and rim. I did a lot of online researching about Spalding, Lifetime, Huffy and any other brand that I found. The user reviews seemed good on Spalding 54” so I ordered it for kids (and myself). I also bought the U-turn lift system by Spalding. Installing the U-turn lift system was very easy, and the instructions were pretty clear. I also used a wrench (you can also use a socket) which made the attaching simpler. It took exactly one hour for my boy and me (he was 11 then) to do the job. We attached the rim and net, and that took us ten more minutes. We followed the exact steps I’m showing you today. My boy instantly went into play mode, and we wasted the rest of the day shooting hoops. Ten days in – he’s taken a thousand shots. With its sturdiness and great rebound feel, the acrylic Spalding 54” (exactly this backboard and rim combo) was well worth it.
How to make sure your replacement basketball backboard is compatible with your pole?
…and how to find the right basketball backboard mounting bracket?
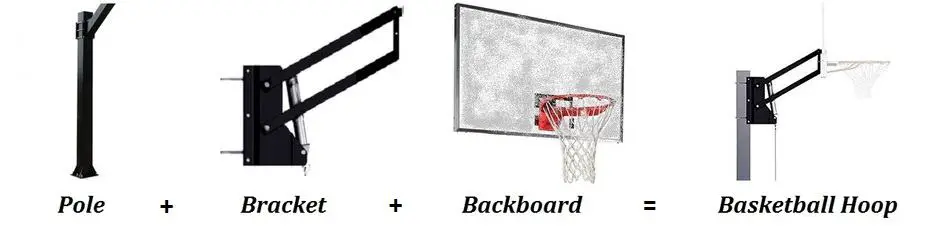
The mounting brackets – the metal installation that attaches the backboard to the central pole of the hoop – depend on the size and shape of the pole of your old basketball hoop.
For example, the shape we need for a replacement Lifetime backboard to match is round; 3.5 inches in diameter. With Lifetime, the limit for a 3.5-inch diameter pole is 10.99 inches.
If you’re sure that the size and pole shape of your existing system fit those measures, consider purchasing a Lifetime backboard. If not, we did a research and came up with some data – just read on.
Anyway, here’s exactly what you need to do…
If you don’t have a new backboard yet:
1. Check the shape and diameter of your pole
2. Look for the bracket that will fit your pole
3. Look for backboard that fits your mounting bracket
4. Replace the backboard
If you already have a new backboard:
1. Check the shape and diameter of the pole
2. Find mounting bracket that fits both
3. Replace the backboard
Let’s look at the table and see what backboard and bracket suit your pole best.
| MOUNTING BRACKETS-> | Lifetime Mounting Kit model 9594 | Spalding U-turn Lifting System | Lifetime 1044 Quick Adjust Conversion Kit |
|---|---|---|---|
| Shape and diameter of suitable pole | Round: 3.5'' | Round: 3.5'', 4'' Square: 4'' | Round: 3.5'' Round: 4'' |
| Compatible backboard models | Spalding 44'' Lifetime 44'' – 54'' | Lifetime 48'' – 54'' Spalding 48'' – 54'' | Huffy, Spalding 44'' Lifetime 44'' - 54'' |
* It’s not advisable to install 60” backboard with bracket, but it seems that U-Turn could handle it. If you’re doing it, please be responsible and tighten up the screws as you mean it.
We found out that the only bracket that supports attaching to a square pole is Spalding 316 U-Turn Lift System. Also, it can be attached to a rounded backboard with “Y” bracket as well as rectangular backboards with either straight or “Y” brackets. Definitely the best bracket out there. While the manufacturer is selling it for $219,99, you can find it on Amazon cheaper. Check out the price in Amazon.
If you have or looking for a 44 inch or less wide backboard and have a round pole, it’s probably best to use Lifetime 1044 Quick Adjust Conversion Kit. It’s affordable, easy to assemble and fits 3.5” and 4” pole and it’s compatible with most 44” backboards out there.
What’s with the ”Y” in Lifetime backboards?
Lifetime has a few mounts for different hoops with the same size pole. Check on the back of your existing backboard if you plan on getting Lifetime backboard to install to your current bracket. If you find a bracket that looks like a capital letter “Y”, you’re set. Any of the replacement backboard manufactured by Lifetime will fit your basketball pole.
How to install a basketball backboard to a pole?
The installation is moderately hard; the instructions are pretty simple, it’s just that the process of putting up ANY basketball system is more on the problematic side.
- Remove the existant backboard if you haven’t already.
- At a point near the surface, assemble mounting bracket to round or square pole using u-bolts, washers, and nuts. Connect jack support brackets to pole bracket using bolts washers and nuts.
- Secure bracket to a flat steady surface. Install bolt heads farther for safety reasons. Attach jack support brackets to pole bracket using bolts, washers, and nuts.
- Attach elevator tubes to the jack support brackets using bolts, washers,
spacers, and nuts. Connect height decal on screw jack. Align the lower end of the decal with screw jack bottom. - Place cover over screw jack. Insert spacer into screw jack assembly. Install screw jack assembly using bolts, washer, and nut.
- Contrary to the manual, put the rim on last, especially if the system is heavy and robust. Use two old bolts from your used backboard’s mounting system to momentarily attach it to the bottom of the “Y” bracket. You could alternatively use two of your four rim bolts to combine the backboard to the mounting system. This takes the weight down through the “big lift”. Further, the rim will just get in the way.
Here are some suggestions to make your installation easier:
At the point where the backboard with half of the mounting system gets attached to your pole (the “big lift”), you will need two more people minimum. Two adults should be enough to lift the backboard and horizontal/diagonal elevator tubes to the top of the pole, while a third person should be on the latter putting the two bolts in to make the connection self-supporting. You can also add one more person to hold the ladders steady, so it seems reasonable why some say to get 3-4 people for that step.
Four tricks to make the “big lift” smooth:
1) Don’t install the rim first, it’s a lot of unnecessary weight to lift.
2) Fix the adjustment on the poles to the lowest setting.
3) The 3rd man’s only job is to get those two bolts on – practice on the ground before the bracket goes on the pole. It will also help to make sure that one of the bolts isn’t too tight so that the poles match later during the lift. Do it before tightening bolts.
4) “Lace” the four elevator tubes using some strong rope through the middle holes, so they are in their fixed positions with some play and aren’t floating around loose. Practice lifting on the ground to guarantee that the four tubes are not swinging randomly.
Doing all of this will save you a lot of time, and it would be a lot safer for you. All steps can be done with one or two people, the other just holding the ladder, or on a second ladder securing the rim at the end.
All of the above is to advise anyone with their installation. These backboard and rim combos can be massive and if you are not able to safely mount it to a roof, wall, or pole then get professional help. For us, we were able to finish the installation securely by using a combination of following the instructions, getting extra help reading reviews like this, and using common sense. Enjoy your basketball hoop!
Problems with replacing the backboard
Sometimes, the assembly manual of the backboard or bracket is not the best. There are no guidelines on what product will match one of those or how to replace the backboard on stationery, in-ground pole. It can be a nightmare trying to find matching hardware that would fit your backboard and vice versa.
It can also happen that the backboard you find (in my friend’s case it was Spalding 48” Extension Arm Offset) is discontinued and without mounting guidelines. If you already have a new backboard to replace, maybe you’ll need to find a mounting bracket that will ”adapt” and you’ll still have to think about it and use creativity.
It’s possible that you’ll need to visit your local hardware store in search of longer carriage bolts because you’ll need to drill a few holes into the poles. Also, maybe you’ll need a longer U-shaped metal piece if you’re putting the new backboard on the pole that came with your previous hoop.
If your former system was spring-mounted and comes with a big ‘U’, you don’t have to disassemble the whole mechanism behind the backboard. Just bolt the new rim onto the current ‘U’ bolt, trapping the fresh backboard in with the rest of retention screws.
Finishing up
Replacing the backboard on basketball hoop seems like a lot of work for a busy man. Fortunately, it isn’t. Following the right instructions is, as always, the key.
In this case, you’ll first need to choose the right bracket to go with your pole, and then the backboard to go with your mounting bracket. Or vice versa. Whatever you do, refer to this article for instructions.
Thank you for reading, and we hope you found this article helpful. If you have time, stay a bit longer on Improve Hoops, see if there’s anything else that could interest you. We’re sure you’ll find something.